Office 365 is one of the paramount email infrastructures and securing communications over it is important, especially for reputed and IT-driven businesses. Creating an SPF record for Office 365 is the first step towards this journey that ensures protection against phishing and spoofing attacks attempted in the name of reputed domains and organizations.
A standard SPF record Office 365 includes all the IP addresses (ipv4 and ipv6) and email servers that are authorized to communicate on behalf of your organization. This ensures illegitimate and blocklisted sending sources can’t dispatch fraudulent messages posing as someone from your company.
You can alter settings and instructions in your SPF TXT record value to manage a potential email spoofing message with fraudulent content. The recipient’s server treats illegitimate emails as per the enforcement rules mentioned in your DNS TXT record for Office 365 SPF.

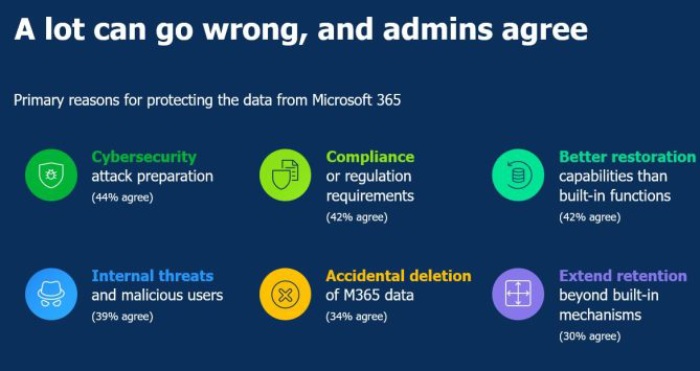
Image sourced from veeam.com
The Significance of SPF Records in Office 365
Microsoft Office 365 is a cloud-based productivity suite that is used by millions of people, and as of February 2023, there are 145,844 customers in the United States alone using the Office Suite software. This count makes Office 365 users a lucrative group of targets for hackers and phishers, which underscores how badly these users need properly configured SPF records for Office 365 to push off vulnerabilities and embrace cybersecurity.
How to Configure SPF Records for Office 365?
An SPF TXT record for a domain consists of SPF record syntax (mechanisms, modifiers, and qualifiers) like ‘include,’ ‘a,’ ‘mx,’ and ‘all.’ Each of them serves a particular purpose and instructs recipients’ mail servers on how to treat spam emails sent using your domain. The ‘include’ tag is integrated explicitly in SPF DNS records to add sending sources of third-party vendors allowed to exchange messages on behalf of your brand.
Here’s an example of an SPF record for Office 365-
v=spf1 include:spf.example.outlook.com -allCreating an SPF Record for Office 365
Here’s what you need to follow-
Access your DNS Management Console
Go to the DNS management console of your domain registrar or DNS hosting provider to generate a new SPF record for Office 365.
Create a New TXT Record
Create a new TXT record with the SPF information. Ensure the record starts with “v=spf1” to indicate the SPF version used.
Specify Office 365 Servers
Add all the mail servers and IP address ranges permitted to send messages on your behalf. The SPF and DKIM authorization helps in DMARC verification as the process is interdependent.

Set the SPF Record Action
The “-all” at the end of the SPF record signifies a strict policy: if an email doesn’t match any of the authorized servers, it should be considered unauthorized. Alternatively, you can use “~all” for a more lenient approach that marks unauthorized emails as soft failures.
SPF Record Office 365 Best Practices
- Regularly review and update your SPF records to align all changes.
- Deploy DKIM and DMARC to comply with the best email security package recommendations and regulations.
- Technical solutions are viable against malicious actors only when users are well aware of red signs. So, educate your users on the importance of recognizing phishing attempts, avoiding suspicious links, and reporting any unusual email activity.